|
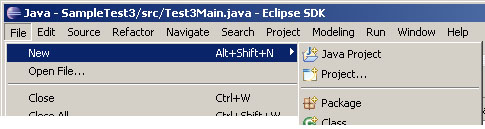
1. Select File->New->Java Project or File->New->Project as shown below.
(Note: your version of Eclipse may or may not give you both options.) |
|
|
|
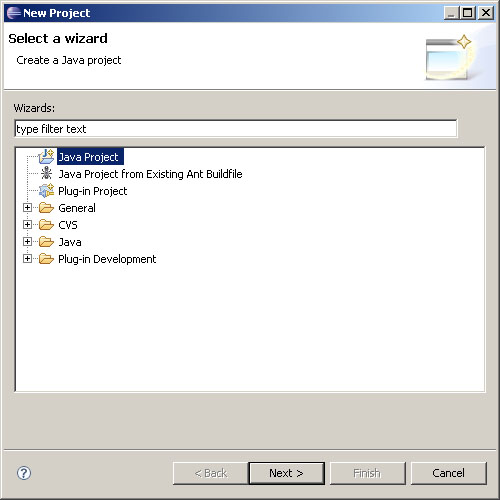
2. If you selected File->New->Project then the dialog box shown below will
appear. Select Java Project in the list then click the Next
button. |
|
|
|
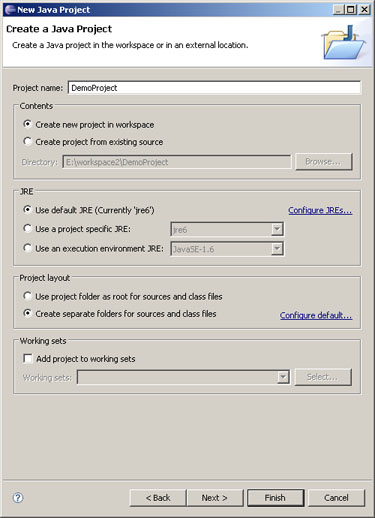
3. In the dialog box shown below enter a name for the project in the text field.
In this sample the project name is DemoProject. After entering a project
name click the Finish button. |
|
|
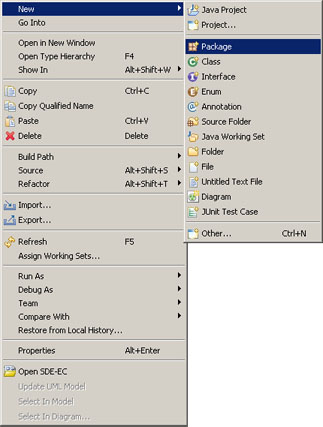
| 1. Right click the src folder in the project and select New from the popup menu, then select Package from the sub-menu as in the image below. |
 |
|
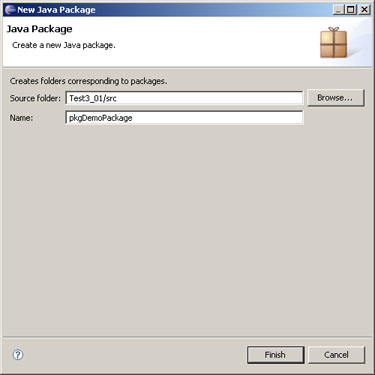
2. In the dialog box that appears (see the image below) enter a name for the
package. By tradition this name is prefixed with pkg but you can
name it just about anything you want. After entering a name for the package
click Finish. |
 |
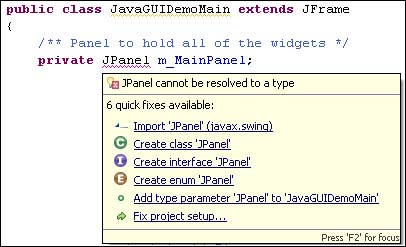
| 1. Right click the package in the project's src folder where you want to create the class. (Note: If you haven't added a package to the project then select the one called (default package). From the popup menu select New, then select Class from the sub-menu as in the image below. |
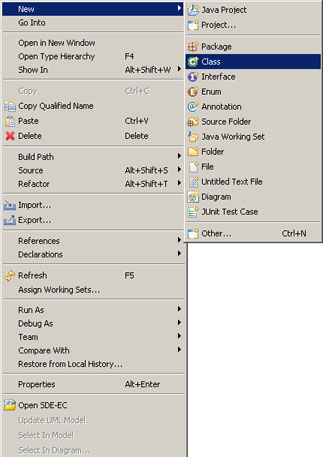 |
|
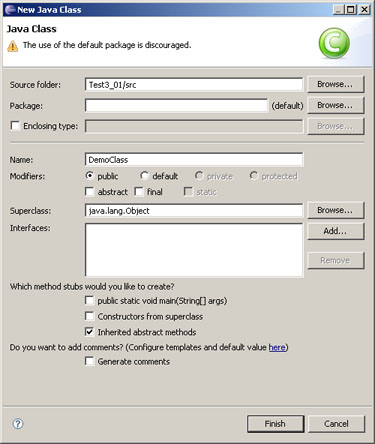
2. In the dialog box that appears (see the image below) enter a name for the
class then click Finish. Note: Make sure you enter the name in the
text field labeled Name. |
 |
 |
 |
|
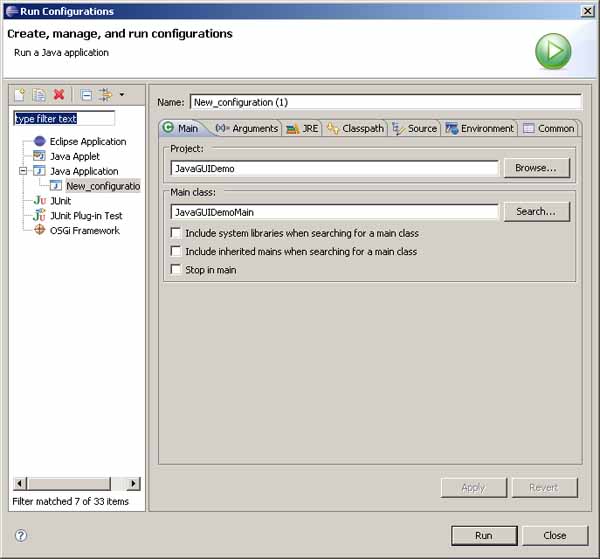
1. Right click the project name in the Package Explorer pane. 2. From the Run menu select Run configuration... 3. Click the Browse button and select the Project. 4. Click the search button and select the file from the list that contains main() 5. Click Run. The Run Configuration is now also available when you create a Runnable JAR file. |
|
 |
|
|
1. Right click the project name in the Package Explorer pane and select Export from the popup menu. (Figure 1). 2. Select Runnable JAR File and click Next in the dialog box. Do NOT type anything in the "Select an Export Destination" text field.(Figure 2). If you do not see Runnable JAR File under Java in the list then click the + next to Java to expand that list node. When you are finished click the Next button. |
|
 Figure 1 |
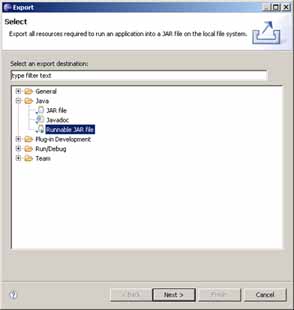 Figure 2 |
|
3. Click the Browse button (Figure 3) and in the Save File dialog box
that appears (Figure 4) select the project directory. 4. Enter an appropriate name for the JAR file in the File name text field. For programs to be turned in for CS 103 this name should be in the format ProgramName-YourName.jar. For example, in Figure 4 the file name that has been entered is JavaGUIDemo-rcoleman.jar 5. Click Save to dismiss the Save File dialog box. 6. From the Launch Configuration combobox (Figure 3) select the appropriate Run Configuration. This will probably be listed as something like New_configuration(1) - ProjectName (as in Figure 3) or ProjectName - MainClassFileName 7. Click the Finish button. Your JAR file will be created and saved to disk in the location you selected. Double click the JAR file to run the application. |
|
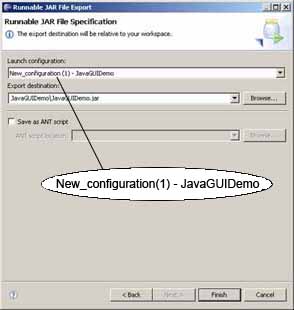 Figure 3 |
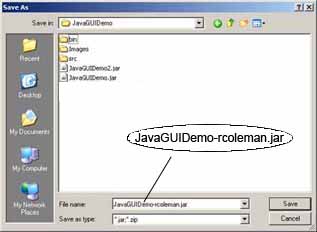 Figure 4 |
