TortoiseSVN is a Subversion client designed to run under the MS Windows environment.
It is not designed for any specific IDE. This means you can check in and check out documents and
source code files and then use them in Eclipse (Java), Visual Studio (C++, Visual Basic), MS Word, etc.
It is integrated into the Windows Explorer (not the web browser).
Sub-menus for Subversion are added to the Windows Explorer when installed.
Icons by each file checked in show its status.
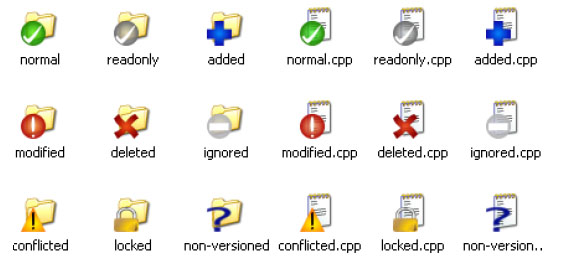
TortiseSVN file icons shown in the Windows Explorer
Installing TortoiseSVN
If you are working on the computers in the CS department labs then you
will have to request that the System Administrator install TortoiseSVN
for you. If you are using your own computer then you can install it
yourself.
-
Go to the http://tortoisesvn.tigris.org
web site, click on Download in the menu and download the installer. Also download
the User’s Manual in PDF format to get the latest version. Click on Docs in the index
on the left of the download page, then select the English PDF version from the list. A
slightly older version is available at the link given below.
-
Double click the installer file and follow directions. Note: You must have Administrator
privileges to install Tortoise on your machine.
-
Restart and open Windows Explorer (not the web browser). Right click Start and select Explore.
-
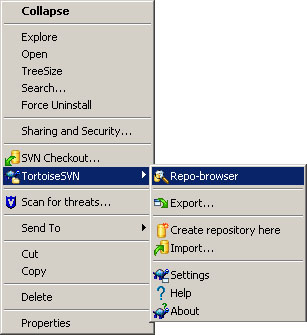
Right click anywhere and in the pop-up menu you will now see the TortoiseSVN items added to the menu
Setting up a Repository
If you are working on the computers in the CS department labs then you
will have to request that the System Administrator set up your SVN account
for you. If you are using your own computer then you can set it up
yourself.
Adding a new project to the Repository
-
Right click a working folder and select TortoiseSVN->Repo-browser
-
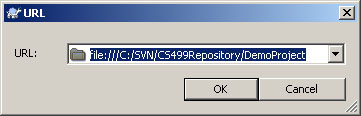
Enter the URL for your repository in the dialog box and click OK.
-
Right click the repository and select Create folder…
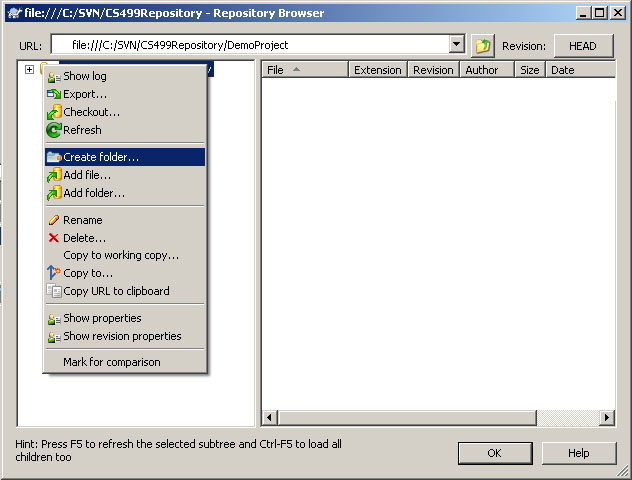
-
Enter the name of the folder.
Adding a folder to the project
-
Open the TortoiseSVN->Repo-browser as shown above.
-
Right click the project folder and select Add folder…
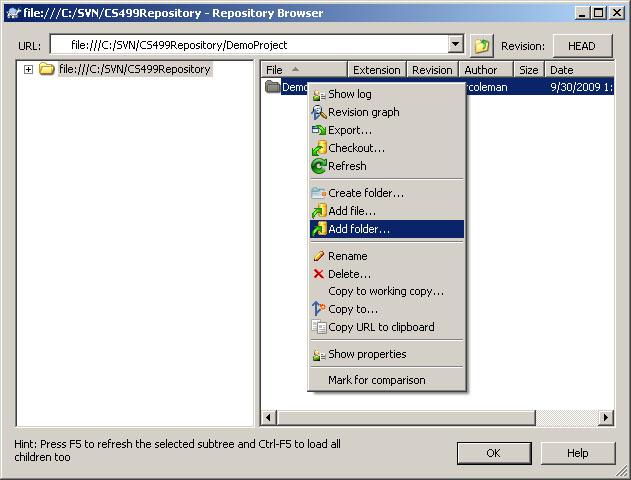
-
Enter the name of the folder.
Adding a file to the project folder
-
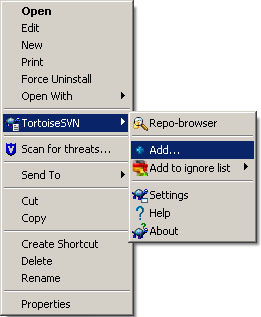
Open the TortoiseSVN->Repo-browser as shown above.
-
Copy the new file into the working folder created above.
-
Right click the file and select TortoiseSVN->Add
Checking out a file to work on
-
Right click the file you want to work on and select SVN Update
to get the latest version from the Repository.

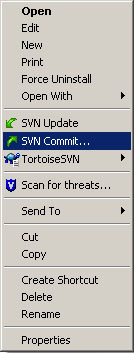
Checking files in
-
Right click the file you have finished working on and select SVN Commit.